

▼ Top rated
Code generator
Free mode
100% free
Freemium
Free Trial
-
I'll provide a high-level design for the client compliance tracking software and a sample Python implementation. **System Design** The system will consist of the following components: 1. **Client Management**: Store client information, including name, address, and contact details. 2. **Form Management**: Store information about each form, including form name, description, and submission deadlines. 3. **Form Submissions**: Track each form submission, including the client, form, submission date, and status (pending, submitted, approved, rejected). 4. **Compliance Status**: Provide a summary of each client's compliance status, including the forms they need to submit and their current status. 5. **Deadline Reminders**: Send reminders to clients about upcoming deadlines for form submissions. 6. **Reporting**: Generate reports on compliance status, including summaries and detailed lists of form submissions. **Database Schema** The database schema will include the following tables: * **clients**: client information (id, name, address, contact details) * **forms**: form information (id, name, description, submission deadline) * **form_submissions**: form submissions (id, client_id, form_id, submission_date, status) * **compliance_status**: compliance status summary (client_id, form_id, status) **Python Implementation** I'll provide a sample implementation using Python and the Flask web framework. ```python from flask import Flask, render_template, request, redirect, url_for from flask_sqlalchemy import SQLAlchemy from datetime import datetime app = Flask(__name__) app.config["SQLALCHEMY_DATABASE_URI"] = "sqlite:///compliance.db" db = SQLAlchemy(app) class Client(db.Model): id = db.Column(db.Integer, primary_key=True) name = db.Column(db.String(100), nullable=False) address = db.Column(db.String(200), nullable=False) contact_details = db.Column(db.String(100), nullable=False) class Form(db.Model): id = db.Column(db.Integer, primary_key=True) name = db.Column(db.String(100), nullable=False) description = db.Column(db.String(200), nullable=False) submission_deadline = db.Column(db.DateTime, nullable=False) class FormSubmission(db.Model): id = db.Column(db.Integer, primary_key=True) client_id = db.Column(db.Integer, db.ForeignKey("client.id"), nullable=False) form_id = db.Column(db.Integer, db.ForeignKey("form.id"), nullable=False) submission_date = db.Column(db.DateTime, nullable=False) status = db.Column(db.String(50), nullable=False) class ComplianceStatus(db.Model): id = db.Column(db.Integer, primary_key=True) client_id = db.Column(db.Integer, db.ForeignKey("client.id"), nullable=False) form_id = db.Column(db.Integer, db.ForeignKey("form.id"), nullable=False) status = db.Column(db.String(50), nullable=False) @app.route("/") def index(): return render_template("index.html") @app.route("/clients") def clients(): clients = Client.query.all() return render_template("clients.html", clients=clients) @app.route("/forms") def forms(): forms = Form.query.all() return render_template("forms.html", forms=forms) @app.route("/form_submissions") def form_submissions(): form_submissions = FormSubmission.query.all() return render_template("form_submissions.html", form_submissions=form_submissions) @app.route("/compliance_status") def compliance_status(): compliance_status = ComplianceStatus.query.all() return render_template("compliance_status.html", compliance_status=compliance_status) if __name__ == "__main__": app.run(debug=True) ``` **Forms and Templates** Create the following templates: * `index.html`: dashboard overview * `clients.html`: client management page * `forms.html`: form management page * `form_submissions.html`: form submissions page * `compliance_status.html`: compliance status summary page **Forms List** The following forms will be included: * ROC forms: ADT-1, ADT-2, ADT-3, ADT-4, AOC-1, AOC-2, AOC-3, AOC-3A, AOC-4, AOC-5, BEN-1, BEN-2, BEN-3, BEN-4, CHG-1, CHG-4, CHG-6, CHG-8, CHG-9, CRA-1, CRA-2, CRA-3, CRA-4, CSR-1, CSR-2, DIR-10, DIR-11, DIR-12, DIR-03, DIR-03 KYC, DIR-5, DIR-06, DIR-08, DIR-09, DPT-03, FC-1, FC-2, FC-3, FC-4, IEPF-1, IEPF-2, IEPF-4, IEPF-5, INC-12, INC-18, INC-19, INC-2, INC-20, INC-20A, INC-22, INC-23, INC-24, INC-25A, INC-26, INC-27, INC-27A, INC-28, INC-29, INC-4, INC-6, INC-7, MBP-1, MGT-1, MGT-11, MGT-12, MGT-13, MGT-14, MGT-15, MGT-2, MGT-3, MGT-4, MGT-5, MGT-6, MGT-7, MGT-7A, MGT-8, MR-1, MR-2, MR-3, MSC-1, MSC-3, MSC-4, MSME-1, MSME-1, PAS-1, PAS-2, PAS-3, PAS-4, PAS-5, PAS-6, SH-1, SH-2, SH-3, SH-4, SH-5, SH-6, SH-7, SH-8, SH-9, SH-10, SH-11, SH-12, SH-13, SH-14, SH-15, SPICE Part A, SPICE Part B, STK-1, STK-2, STK-3, STK-4 * Other forms: Form-3, Form-4, Form-5, Form-8, Form-11, Form-12, Form-15, Form-22, Form-23, Form-24, Form-25, Form-27, Form-28, Form-31, Form-32, Form LLP BEN2, Form4D **Next Steps** 1. Implement user authentication and authorization. 2. Develop the client management page. 3. Develop the form management page. 4. Develop the form submissions page. 5. Develop the compliance status summary page. 6. Implement deadline reminders. 7. Implement reporting features. This is a high-level design and implementation, and there are many details that need to be addressed. However, this should provide a good starting point for building a client compliance tracking software. This high-level design and sample Python implementation provides a good starting point. However, the implementation details are not sufficient. Could you provide a more detailed implementation in Python, including the following: 1. **Models**: Define the models for Client, Form, FormSubmission, and ComplianceStatus using SQLAlchemy. 2. **Database**: Create the database tables using the models. 3. **Forms**: Define forms for client management, form submissions, and compliance status updates using Flask-WTF. 4. **Routes**: Implement routes for client management, form submissions, and compliance status updates. 5. **Templates**: Provide sample templates for each page. I'll review the detailed implementation and provide feedback. Here's a more detailed implementation: **Models** ```python from flask_sqlalchemy import SQLAlchemy from datetime import datetime db = SQLAlchemy() class Client(db.Model): id = db.Column(db.Integer, primary_key=True) name = db.Column(db.String(100), nullable=False) address = db.Column(db.String(200), nullable=False) contact_details = db.Column(db.String(100), nullable=False) def __repr__(self): return f"Client('{self.name}', '{self.address}', '{self.contact_details}')" class Form(db.Model): id = db.Column(db.Integer, primary_key=True) name = db.Column(db.String(100), nullable=False) description = db.Column(db.String(200), nullable=False) submission_deadline = db.Column(db.DateTime, nullable=False) def __repr__(self): return f"Form('{self.name}', '{self.description}', '{self.submission_deadline}')" class FormSubmission(db.Model): id = db.Column(db.Integer, primary_key=True) client_id = db.Column(db.Integer, db.ForeignKey("client.id"), nullable=False) form_id = db.Column(db.Integer, db.ForeignKey("form.id"), nullable=False) submission_date = db.Column(db.DateTime, nullable=False, default=datetime.utcnow) status = db.Column(db.String(50), nullable=False, default="pending") client = db.relationship("Client", backref=db.backref("form_submissions", lazy=True)) form = db.relationship("Form", backref=db.backref("form_submissions", lazy=True)) def __repr__(self): return f"FormSubmission('{self.client.name}', '{self.form.name}', '{self.submission_date}', '{self.status}')" class ComplianceStatus(db.Model): id = db.Column(db.Integer, primary_key=True) client_id = db.Column(db.Integer, db.ForeignKey("client.id"), nullable=False) form_id = db.Column(db.Integer, db.ForeignKey("form.id"), nullable=False) status = db.Column(db.String(50), nullable=False, default="not started") client = db.relationship("Client", backref=db.backref("compliance_status", lazy=True)) form = db.relationship("Form", backref=db.backref("compliance_status", lazy=True)) def __repr__(self): return f"ComplianceStatus('{self.client.name}', '{self.form.name}', '{self.status}')" ``` **Database** ```python with app.app_context(): db.create_all() ``` **Forms** ```python from flask_wtf import FlaskForm from wtforms import StringField, DateField, SelectField, SubmitField from wtforms.validators import DataRequired class ClientForm(FlaskForm): name = StringField("Name", validators=[DataRequired()]) address = StringField("Address", validators=[DataRequired()]) contact_details = StringField("Contact Details", validators=[DataRequired()]) submit = SubmitField("Submit") class FormSubmissionForm(FlaskForm): client_id = SelectField("Client", coerce=int) form_id = SelectField("Form", coerce=int) submission_date = DateField("Submission Date") status = SelectField("Status", choices=["pending", "submitted", "approved", "rejected"]) submit = SubmitField("Submit") class ComplianceStatusForm(FlaskForm): client_id = SelectField("Client", coerce=int) form_id = SelectField("Form", coerce=int) status = SelectField("Status", choices=["not started", "in progress", "completed"]) submit = SubmitField("Submit") ``` **Routes** ```python @app.route("/") def index(): return render_template("index.html") @app.route("/clients") def clients(): clients = Client.query.all() return render_template("clients.html", clients=clients) @app.route("/clients/new", methods=["GET", "POST"]) def new_client(): form = ClientForm() if form.validate_on_submit(): client = Client(name=form.name.data, address=form.address.data, contact_details=form.contact_details.data) db.session.add(client) db.session.commit() return redirect(url_for("clients")) return render_template("new_client.html", form=form) @app.route("/forms") def forms(): forms = Form.query.all() return render_template("forms.html", forms=forms) @app.route("/form_submissions") def form_submissions(): form_submissions = FormSubmission.query.all() return render_template("form_submissions.html", form_submissions=form_submissions) @app.route("/form_submissions/new", methods=["GET", "POST"]) def new_form_submission(): form = FormSubmissionForm() form.client_id.choices = [(client.id, client.name) for client in Client.query.all()] form.form_id.choices = [(form.id, form.name) for form in Form.query.all()] if form.validate_on_submit(): form_submission = FormSubmission(client_id=form.client_id.data, form_id=form.form_id.data, submission_date=form.submission_date.data, status=form.status.data) db.session.add(form_submission) db.session.commit() return redirect(url_for("form_submissions")) return render_template("new_form_submission.html", form=form) @app.route("/compliance_status") def compliance_status(): compliance_status = ComplianceStatus.query.all() return render_template("compliance_status.html", compliance_status=compliance_status) @app.route("/compliance_status/new", methods=["GET", "POST"]) def new_compliance_status(): form = ComplianceStatusForm() form.client_id.choices = [(client.id, client.name) for client in Client.query.all()] form.form_id.choices = [(form.id, form.name) for form in Form.query.all()] if form.validate_on_submit(): compliance_status = ComplianceStatus(client_id=form.client_id.data, form_id=form.form_id.data, status=form.status.data) db.session.add(compliance_status) db.session.commit() return redirect(url_for("compliance_status")) return render_template("new_compliance_status.html", form=form) ``` **Templates** Create the following templates: * `index.html`: dashboard overview * `clients.html`: client management page * `new_client.html`: new client page * `forms.html`: form management page * `form_submissions.html`: form submissions page * `new_form_submission.html`: new form submission page * `compliance_status.html`: compliance status summary page * `new_compliance_status.html`: new compliance status page This implementation provides a more detailed example of how the client compliance tracking software could be built using Flask and SQLAlchemy. Your implementation provides a good foundation for building the client compliance tracking software. However, I would like to add more functionality to the software, such as: 1. **User Management**: Add user management features, including user registration, login, and role-based access control. 2. **Form Automation**: Automate form submissions by integrating with external APIs or services. 3. **Notifications**: Send notifications to clients and users about upcoming deadlines, form submissions, and compliance status updates. To implement these features, I can leverage libraries like Flask-Login, Flask-Principal, and Flask-Mail. Here's an example of how you could implement user management using Flask-Login and Flask-Principal: **User Model** ```python class User(db.Model): id = db.Column(db.Integer, primary_key=True) username = db.Column(db.String(64), unique=True, nullable=False) email = db.Column(db.String(120), unique=True, nullable=False) password_hash = db.Column(db.String(128)) def set_password(self, password): self.password_hash = generate_password_hash(password) def check_password(self, password): return check_password_hash(self.password_hash, password) def __repr__(self): return f"User('{self.username}', '{self.email}')" ``` **User Registration and Login** ```python from flask_login import LoginManager, UserMixin, login_user, logout_user, login_required, current_user login_manager = LoginManager() login_manager.init_app(app) @login_manager.user_loader def load_user(user_id): return User.query.get(int(user_id)) @app.route("/register", methods=["GET", "POST"]) def register(): form = RegistrationForm() if form.validate_on_submit(): user = User(username=form.username.data, email=form.email.data) user.set_password(form.password.data) db.session.add(user) db.session.commit() return redirect(url_for("login")) return render_template("register.html", form=form) @app.route("/login", methods=["GET", "POST"]) def login(): form = LoginForm() if form.validate_on_submit(): user = User.query.filter_by(username=form.username.data).first() if user and user.check_password(form.password.data): login_user(user) return redirect(url_for("index")) return render_template("login.html", form=form) @app.route("/logout") @login_required def logout(): logout_user() return redirect(url_for("index")) ``` **Role-Based Access Control** ```python from flask_principal import Principal, Permission, RoleNeed principals = Principal(app) admin_permission = Permission(RoleNeed("admin")) moderator_permission = Permission(RoleNeed("moderator")) @app.route("/admin") @admin_permission.require(http_exception=403) def admin(): return "Admin page" @app.route("/moderator") @moderator_permission.require(http_exception=403) def moderator(): return "Moderator page" ``` **Notifications** ```python from flask_mail import Mail, Message mail = Mail(app) def send_notification(subject, recipients, body): msg = Message(subject, recipients=recipients, body=body) mail.send(msg) @app.route("/send_notification", methods=["POST"]) def send_notification_route(): subject = request.form["subject"] recipients = request.form["recipients"] body = request.form["body"] send_notification(subject, recipients, body) return "Notification sent" ``` Please let me know if this implementation meets your requirements or if you need further modifications.
-
Here is an example of HTML code for a simple login form: ``` <!DOCTYPE html> <html> <head> <title>Login Form</title> <style> body { font-family: Arial, sans-serif; } .container { width: 300px; background-color: #f9f9f9; padding: 20px; border: 1px solid #ccc; border-radius: 5px; box-shadow: 0 0 10px rgba(0, 0, 0, 0.1); } </style> </head> <body> <div class="container"> <h2>Login Form</h2> <form> <label for="username">Username:</label> <input type="text" id="username" name="username"><br><br> <label for="password">Password:</label> <input type="password" id="password" name="password"><br><br> <input type="submit" value="Login"> </form> </div> </body> </html> ``` This code creates a basic login form with a username and password input, and a submit button. Note that this code does not include any server-side validation or authentication, it's just a basic HTML form. If you want to add functionality to this form, you will need to add JavaScript code to handle the form submission and validate the input data. You will also need to create a server-side script to handle the form data and authenticate the user. Let me know if you need any further assistance or if you have any specific requirements for the login form.
-
```html <!DOCTYPE html> <html lang="en"> <head> <meta charset="UTF-8"> <meta name="viewport" content="width=device-width, initial-scale=1.0"> <title>Minimal Digital Clock</title> <style> body { font-family: Arial, sans-serif; display: flex; justify-content: center; align-items: center; height: 100vh; margin: 0; background-color: #f0f0f0; } .clock-container { background-color: #fff; border-radius: 10px; padding: 20px; box-shadow: 0 0 10px rgba(0,0,0,0.1); } #clock { font-size: 3rem; font-weight: bold; text-align: center; margin-bottom: 10px; } select { width: 100%; padding: 5px; margin-bottom: 10px; } label { display: flex; align-items: center; justify-content: center; margin-bottom: 10px; } </style> </head> <body> <div class="clock-container"> <div id="clock"></div> <select id="timezone"> <!-- Time zones will be populated dynamically --> </select> <label> <input type="checkbox" id="format-toggle"> 24-hour format </label> </div> <script> const clock = document.getElementById('clock'); const timezoneSelect = document.getElementById('timezone'); const formatToggle = document.getElementById('format-toggle'); // Populate time zone options moment.tz.names().forEach(tz => { const option = document.createElement('option'); option.value = tz; option.textContent = tz; timezoneSelect.appendChild(option); }); function updateClock() { const selectedTimezone = timezoneSelect.value; const use24HourFormat = formatToggle.checked; const now = moment().tz(selectedTimezone); const format = use24HourFormat ? 'HH:mm:ss' : 'hh:mm:ss A'; clock.textContent = now.format(format); } // Update clock every second setInterval(updateClock, 1000); // Update clock when time zone or format changes timezoneSelect.addEventListener('change', updateClock); formatToggle.addEventListener('change', updateClock); // Initial clock update updateClock(); </script> <script src="https://cdnjs.cloudflare.com/ajax/libs/moment.js/2.29.1/moment.min.js"></script> <script src="https://cdnjs.cloudflare.com/ajax/libs/moment-timezone/0.5.33/moment-timezone-with-data.min.js"></script> </body> </html> ``` This code creates a minimal digital clock with the following features: 1. Displays time in 12-hour or 24-hour format 2. Allows selection of any time zone 3. Updates in real-time 4. Has a clean, modern design Key points: - Uses HTML, CSS, and JavaScript for implementation - Utilizes the Moment.js library for handling time zones and formatting - Responsive design that works on various screen sizes - Easy to customize colors and styles To use this code, save it as an HTML file and open it in a web browser. Make sure you have an active internet connection for the Moment.js library to load properly.
-
### Even Number Filter Function #### Function Description The following Python function filters a list of integers and returns a new list containing only the even numbers. #### Code ```python def filter_even_numbers(numbers): """ This function takes a list of integers and returns a new list containing only the even numbers. Args: numbers (list): A list of integers. Returns: list: A list of even integers. """ # Using list comprehension to create a new list with only even numbers # The 'if' condition inside the list comprehension checks if a number is even (i.e., remainder when divided by 2 is 0) even_numbers = [num for num in numbers if num % 2 == 0] # Return the list of even numbers return even_numbers # Example usage if __name__ == "__main__": numbers_list = [1, 2, 3, 4, 5, 6, 7, 8, 9, 10] print("Original List:", numbers_list) print("Even Numbers:", filter_even_numbers(numbers_list)) ``` #### Explanation - The function `filter_even_numbers` takes one argument: `numbers`, which is expected to be a list of integers. - Inside the function, a list comprehension is used to iterate over each number (`num`) in the input list (`numbers`). - The `if` condition `num % 2 == 0` filters out odd numbers, only including numbers that are divisible by 2 (i.e., even numbers) in the new list. - The resulting list of even numbers is then returned by the function. #### Important Considerations - This function assumes that the input will be a list. If the input might be something else, you should add error checking code to handle that. - The function uses list comprehension for conciseness and efficiency. For very large lists, this approach is memory-efficient because it avoids the need to append to a list in a loop.Dua Batool🙏 1 karmaSep 24, 2025@Code Generatoruser friendly and gaves accurate results so for me its 10/10 tool

Featured matches
-

-
 Modular & Cross-Platform Vibe Coding Editor and Workflow Automation on Any DeviceOpen
 good!A different kind of AI tool that has been very helpful for my work!
 -
 LLM-driven security review and fixes, seamlessly integrated into your GitHub pull requests.Open
-
 🃏 Share Your Draw reading type, where you can share the cards you drew on your offline draw, share its details, spread, card positioning, intent, question, and have it interpreted by our cutting edge and wise AI Tarot reader! 🗺️ Journey Map feature, that crafts entire chapters of your journey based on your readings all their nuances and subtleties, full of actionable insights and reflections, 🪐 The Cosmos, an astrological orrery, full of insights on the cosmic energies that surround and influence us, 📖 The Tarot Tales by esotericAI, daily fictional tarot tales with Q&A and full of reflections to inspire us, 🎁 Reminder that the promo coupons for 50% discount on subscriptions is still up for any sign ups from TAAFT link! You automatically get a 50% off coupon, that is automatically applied to your first subscription month or YEAR(!) depending on what you choose.
 -
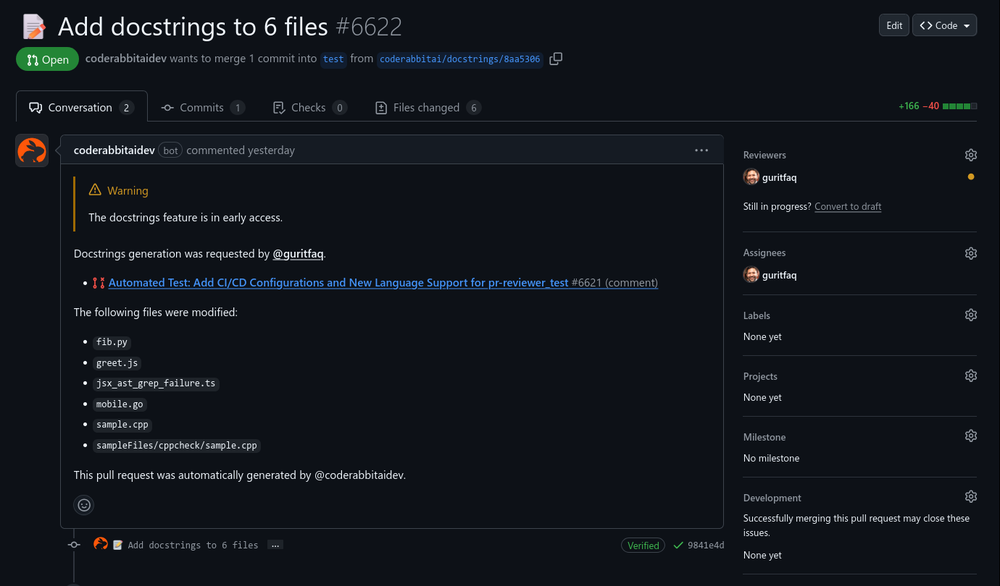 Introducing CodeRabbit Issue Planner! ✨ AI agents made coding fast but planning messy. Turn planning into a shared artifact in your issue tracker, grounded in related issues and decisions. Review prompts as a team, then hand them off to an agent! Claude or Cursor can generate a plan in seconds, but they won’t know about the related issue from last sprint, the architectural decision buried in comments, or the refactor already in flight. So they confidently plan the wrong thing. Plans like these either lead to an iterative prompting time suck, or are subtly wrong in ways you only discover during implementation or review, after assumptions harden and rewrites erase all your AI speed gains. CodeRabbit Issue Planner turns planning into a shared artifact in your issue tracker. > Plans are grounded in related issues, past decisions, and context. > Teams align with prompt reviews before code exists. > Plans are then handed off to any agent. By aligning on intent up front, teams reduce AI slop and rework, save time, and make AI usable for everyone… not just a few “prompt whisperers” on the team. So, you ACTUALLY move faster with AI.
 -

-
 Test failure can be triggered by: - Text not being found - Image not being found - "Assert" condition not being met (according to AI with 90% confidence)
 -
 Maybe give it another go now? It works just fine for me
 -

-
 Assign Jira tickets directly to Cursor agents and get PRs and Previews.Open


Other tools
-
 Build AI Mobile & Web Apps - No Code, No Api KeysOpenI built my fitness app and published it to both App Store and Google Play in just 3 days. OnSpace AI handled all the mobile development complexity. I'm now earning from in-app subscriptions.
 -
- Sponsor:
 Nebius Token Factory🧠 AI inference
 -
 Generate code snippets, functions, and components with AI assistance.OpenGreat tool for helping with coding tasks.
 -
 Open
Open -
 Open
Open - Didn't find the AI you were looking for?
-
I need to create a relationship between the Excel that contains the phone numbers in column A for the people to whom I want to send their performance sheet via WhatsApp every month with the click of a button automatically and without any intervention from me, knowing that the performance sheet is an image in column C and each person has his own sheet where the only link between the performance sheet and the phone number is their personal names
-
 Open
Open -
Scrollsequence is a game-changer for interactive storytelling! Smooth animations, intuitive setup, and impressive control over scrolling sequences make it perfect for engaging web experiences. Highly recommend for designers and developers looking to elevate their sites. 🙌
-
Hey everyone, I'm Florent, maker of Facet! Please feel free to give me any feedback good or bad you have, it will help me make great improvements! We already have dozens of users and try to use all feedback to enhance the application!
-
Farol is been clutch for spotting trends before they blow up everywhere. I've caught a few product launches and tech shifts early enough to actually post something original instead of just adding to the noise. If you're always feeling a step behind on what's trending, this one's worth a look!
-
-
Thank you Mayank for your support! 🙏 We're committed to helping as many job seekers as possible succeed in their interviews. Your encouragement motivates us to keep improving Acedit.ai! 💫
-
 Transform programming ideas into crystal-clear pseudocode instantly.Open
 -
Cool tool. I hope you continue to develop this tool to reach its full potential. Keep it up


Post


